Posts Tagged ‘public courses’

Donnie’s Friday Focus: Jimmy Clay front-nine

The Jimmy Clay/Roy Kizer golf complex is far and away my favorite place for public golf in Austin. All in one place you have two 18-hole courses, two putting greens, a driving range with lights for night practice and a short/practice course consisting of four par 3’s and its own separate putting green and practice bunker.

The two courses are both moderately priced, Jimmy Clay features a more American country club style with narrow, tree-lined fairways and Roy Kizer is a wide open links-style course and a bit more expensive. If you don’t have time for an entire round, it’s only $5 to practice on the short course and you can play it and use the putting green and practice bunker as much as you like. Great deal.

Today I’m going to focus on Jimmy Clay because I find the layout more challenging due to the doglegged, tree-line fairways. I have no problem with links-style golf, I just find Jimmy Clay is a bit more difficult to navigate if you’re new to the course due to the abundance of trees.

#1 par 4 385 yds.
The first hole is a sharp dogleg left with water all along the left side. You may occasionally see golfers intentionally hit the ball over the water and on to the ninth fairway to get a better, closer angle to the green. Even if you don’t feel it’s your place to correct them, notice that there are white stakes along the outside of the water hazard indicating that playing that route is illegal, out-of-bounds, and the golfer should be taking a stroke and hitting his third shot from the tee-box. Your approach shot must be straight because the water still lurks on the left and thick trees pose trouble on your right. The green slopes back to front and features two bunkers, one on the left and one on the right. Finding yourself in these bunkers isn’t terrible. It’s better than being in the water or punching out of the trees.
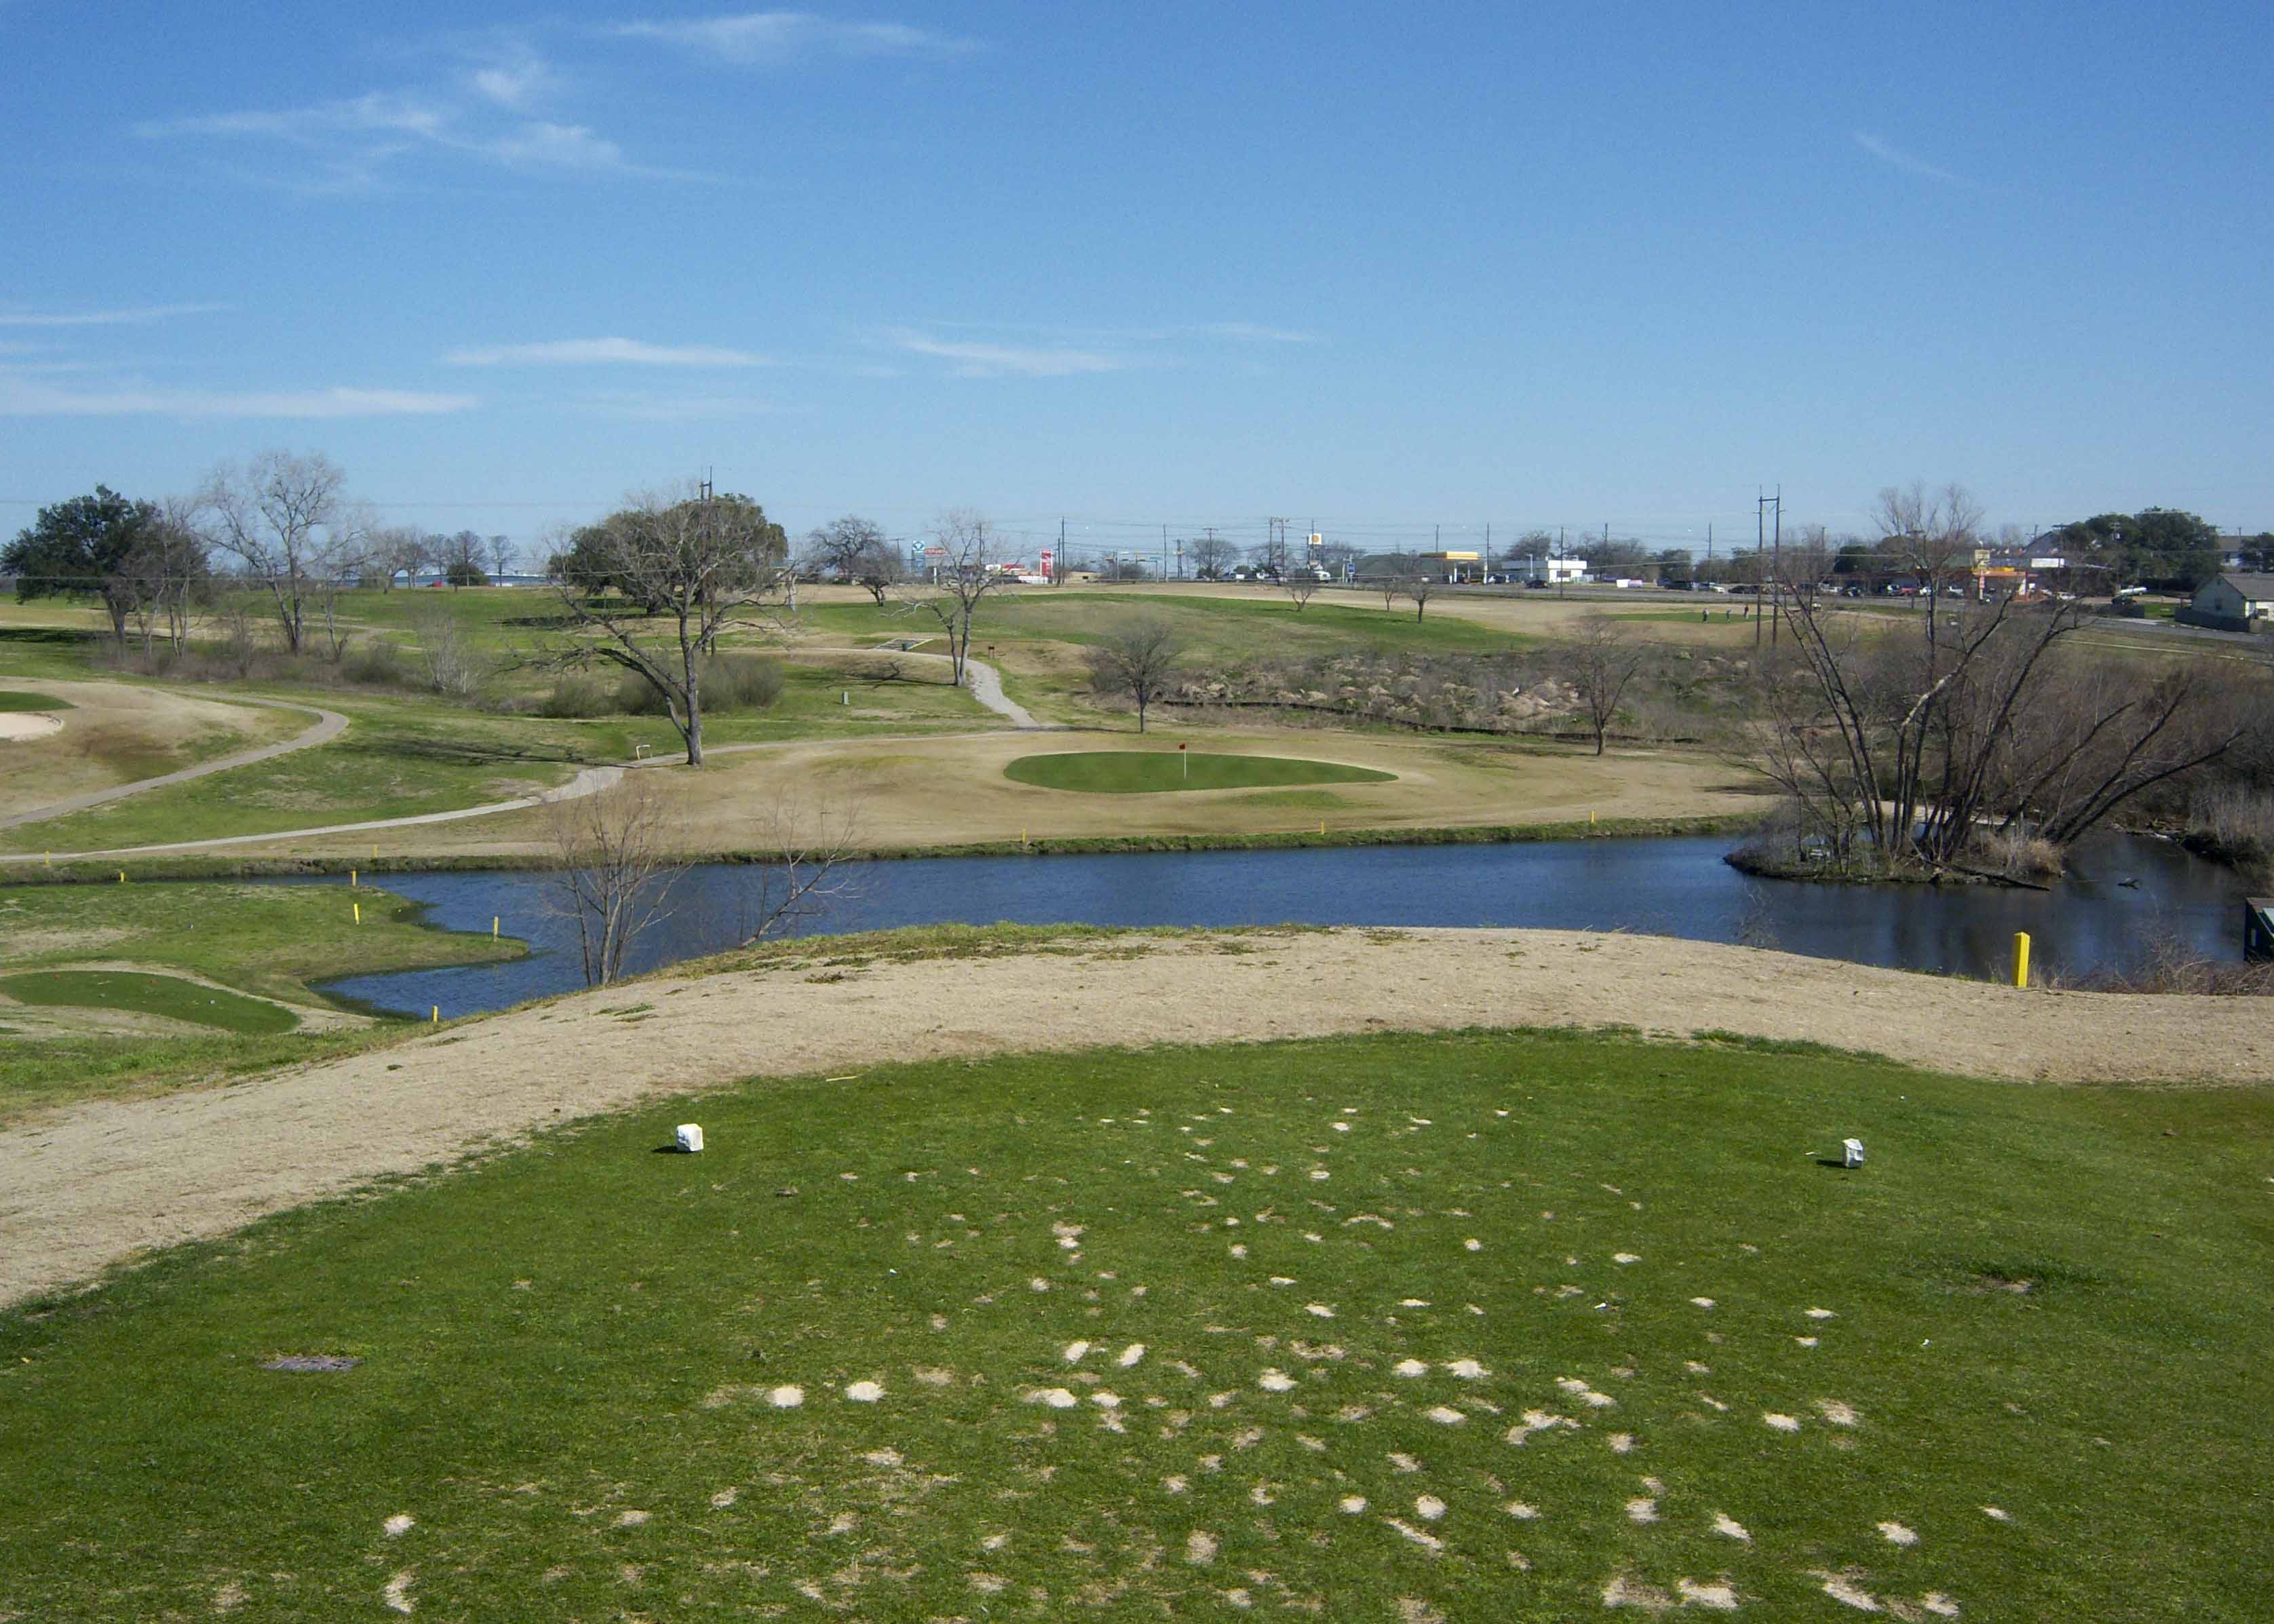
#2 par 3 134 yds.
This is short par three into an hourglass green that gets pretty narrow around the neck. The surface itself is fairly flat but does roll of the back of the green down the hill. It’s much better to be short, below the hole than to be long or in either bunker guarding the front-right and back-left of the green. Club selection is key on this hole. Get a good feel for what the wind is doing before you tee-off.

From the blue tees, #3 might be the most difficult driving hole of all the public courses in Austin.

#3 par 4 361 yds.
From the blue tees, this might be the most difficult driving hole of all the public courses in Austin. The narrow fairway doglegs sharply to the right and both sides are heavily guarded by thick trees. If you push your drive right, blast it. There is a clearing in the trees. You have to hit it pretty far to get there but trust me it’s there and you’ll have an open shot to the green. Whatever you do, don’t go left. The fairway itself slopes from right to left toward the trees and there’s a steep run-off along the tree-line that will cause your ball to roll down into the creek. The green itself is turtlebacked and not terribly difficult to put on. Getting started off the tee is the problem.

#4 par 5 540 yds.
From the tee it looks like you don’t have much room on your drive. The truth is, there’s plenty of room on your right once you get past the immediate trees right in front of you. Don’t go left. The trees are too think and you won’t be able to find your ball. Aim toward the pair of bunkers on top of the hill and hit a slight draw if you have one. From there it’s a straight shot, or two depending on how aggressive you are, to an elevated green that runs off the back. The surface is two-tiered and is guarded by two front bunkers. Whatever tier the pin is on that day is where you want to be.
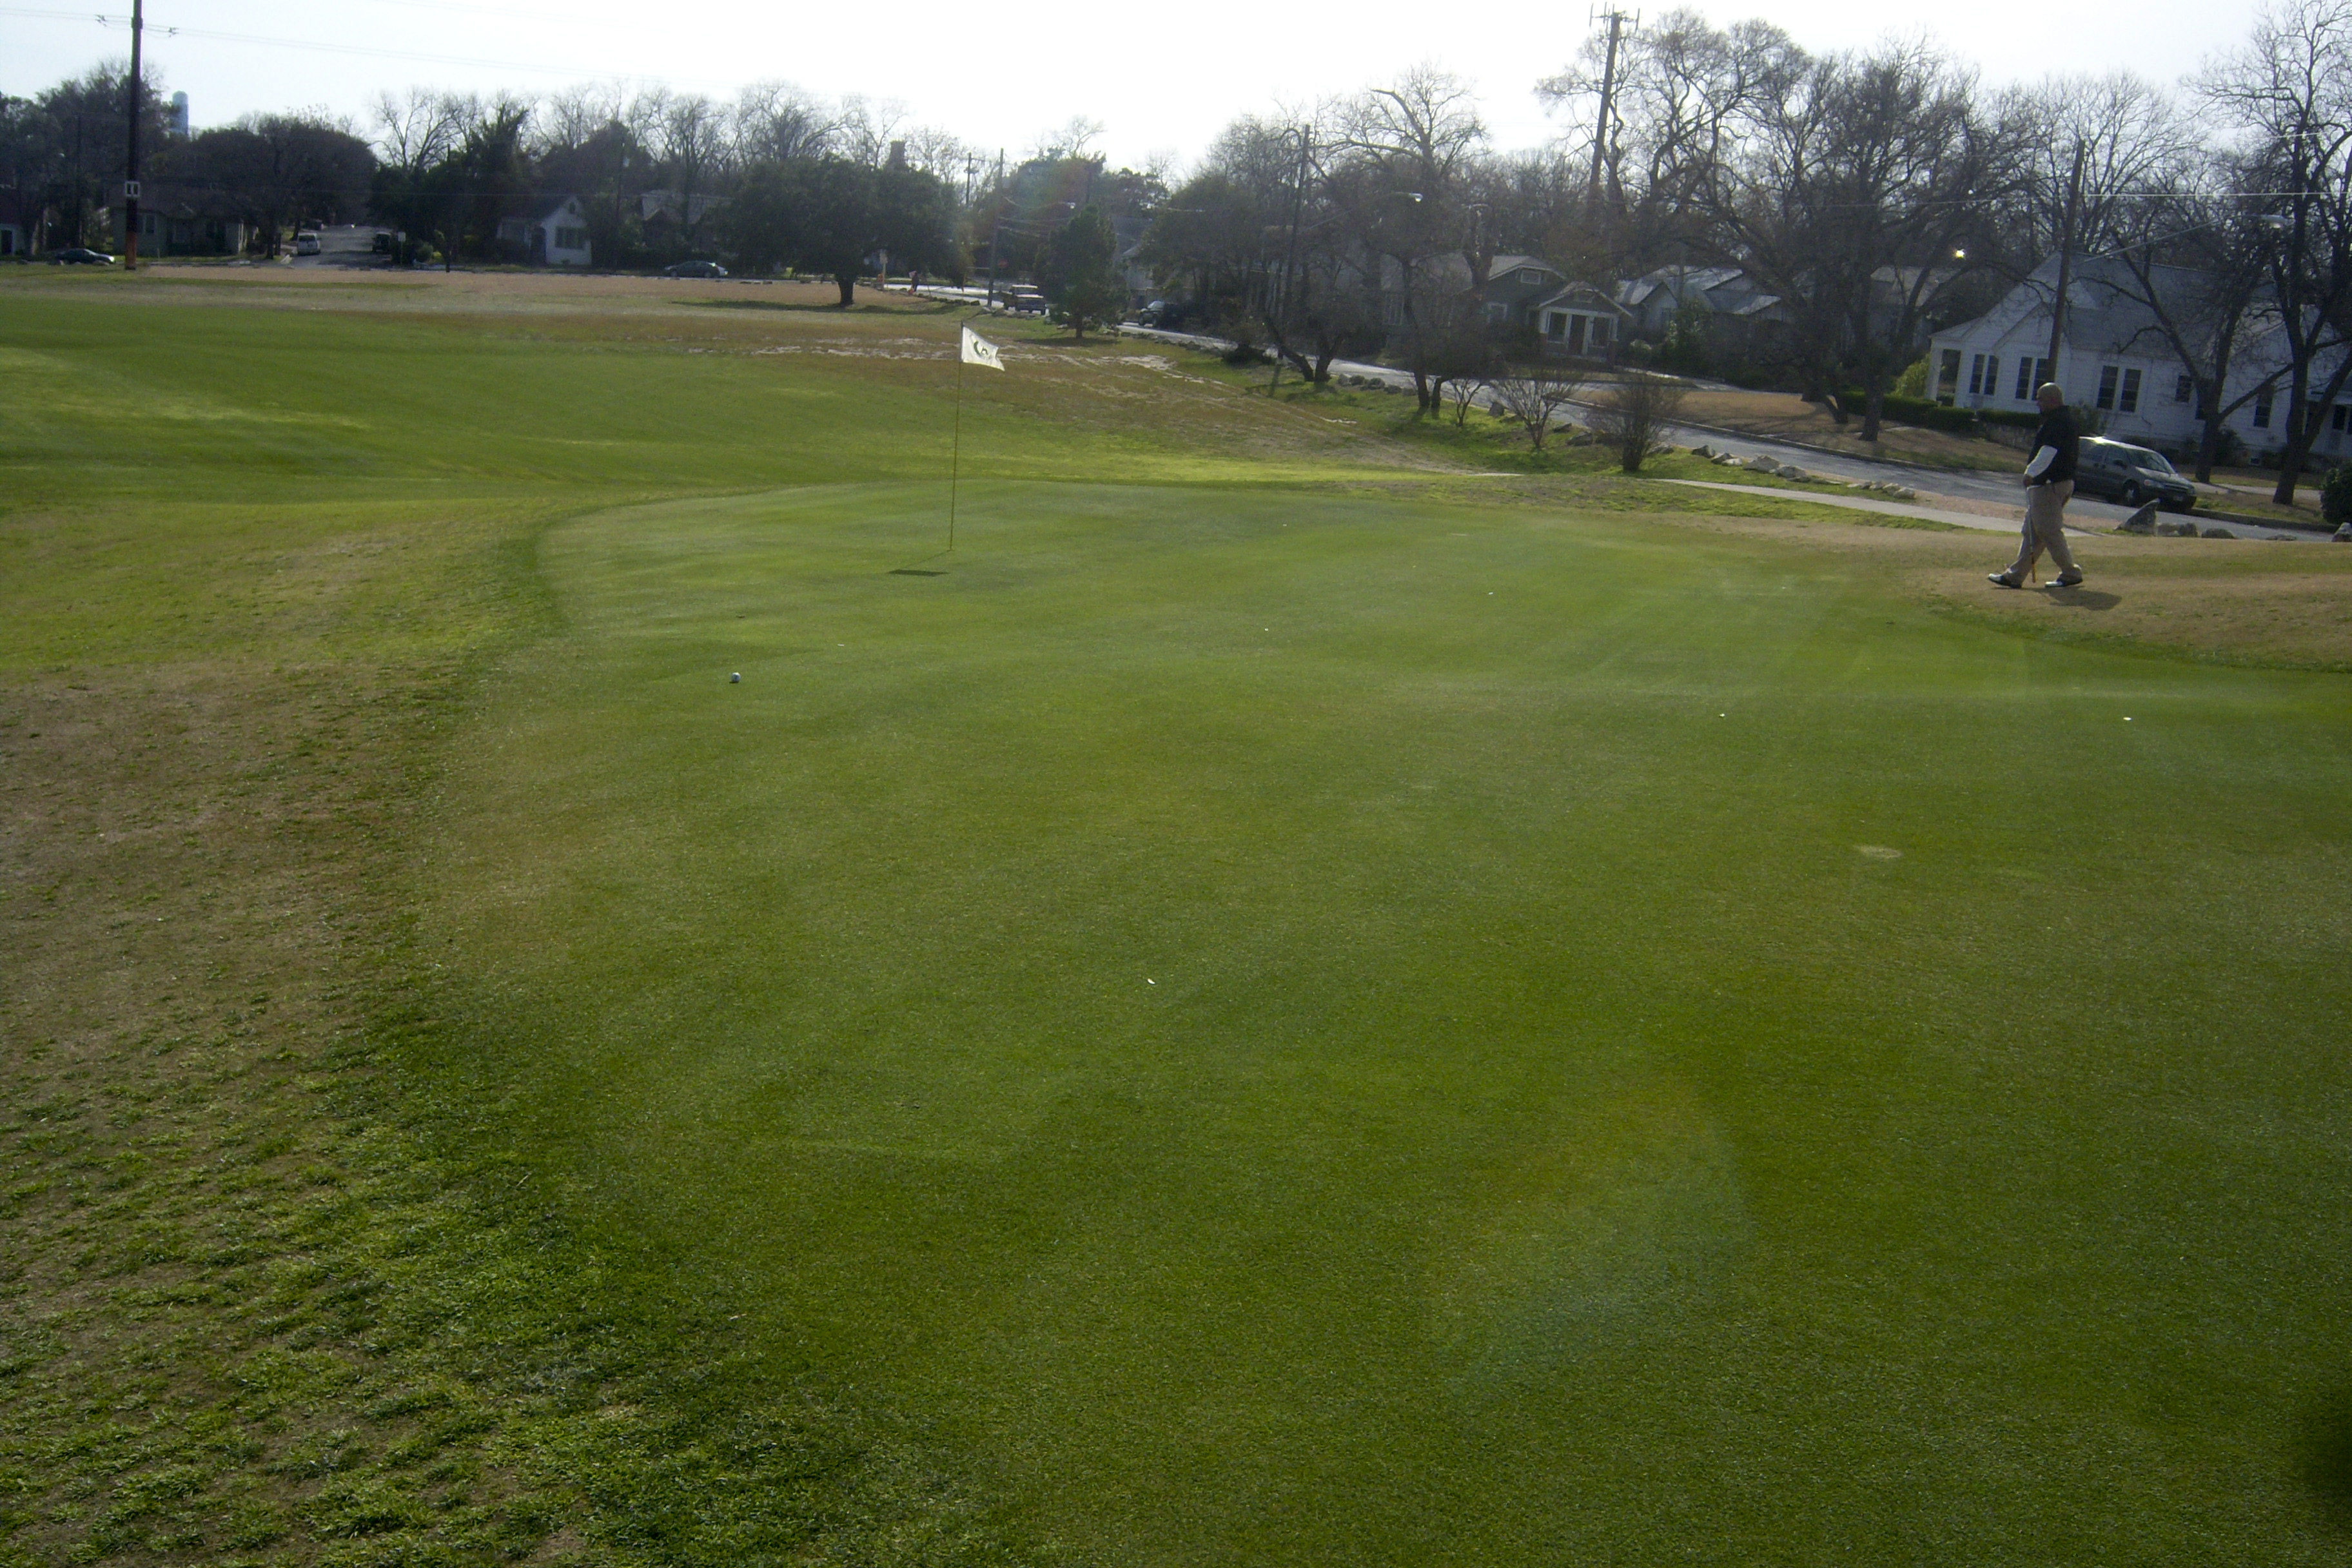
#5 par 3 98 yds.
A 98 yd. par 3 with no bunkers or water should be a walk in the park, but for some reason this hole drives me crazy. It’s all about distance and wind. The green itself is narrow from front to back and runs off if you’re short or long. You’re definitely going to have a wedge of some sort in your hand for this shot, but which wedge to chose is always my problem. Study the wind, trust your distances, decide on a club and strike it clean. If you land on the green, putting is cake on this hole. If you go long and find yourself at the bottom of the hill, you’re not alone. I’ve been there plenty. Just be careful on your chip back up to the green. The last thing you want is to go long and run off the front of the green and be in the same position you are now, from the other side.

It sure looks pretty, but the island green on #6 can play tricks with your mind.

#6 par 4 291 yds.
If you’ve never played here before, you can’t see the green or the water from the tee-box. Just know that they are definitely in reach. Oh yeah and by the way, the green is an island. Keep the driver in your bag, grab a long iron and hit a straight shot. From there you’ll be left with a 100 yd. wedge into the island. If you go left off the tee, you’ll lose your ball in the woods. If you go right, you’ll be able to find your ball, but will have no shot at reaching the island green in two. So here you are, 100 yds. away from the green with a wedge in your hand. Under any other circumstances you can hit this green 10-out-of-10 times. There’s just something about island greens that cause you to doubt yourself. Fight through it. Trust your swing. If you’re undecided when you address the ball, step back and go through your routine again. Forget about where the pin is and aim for the middle of the green. Bragging rights for the rest of the round are yours for the taking.
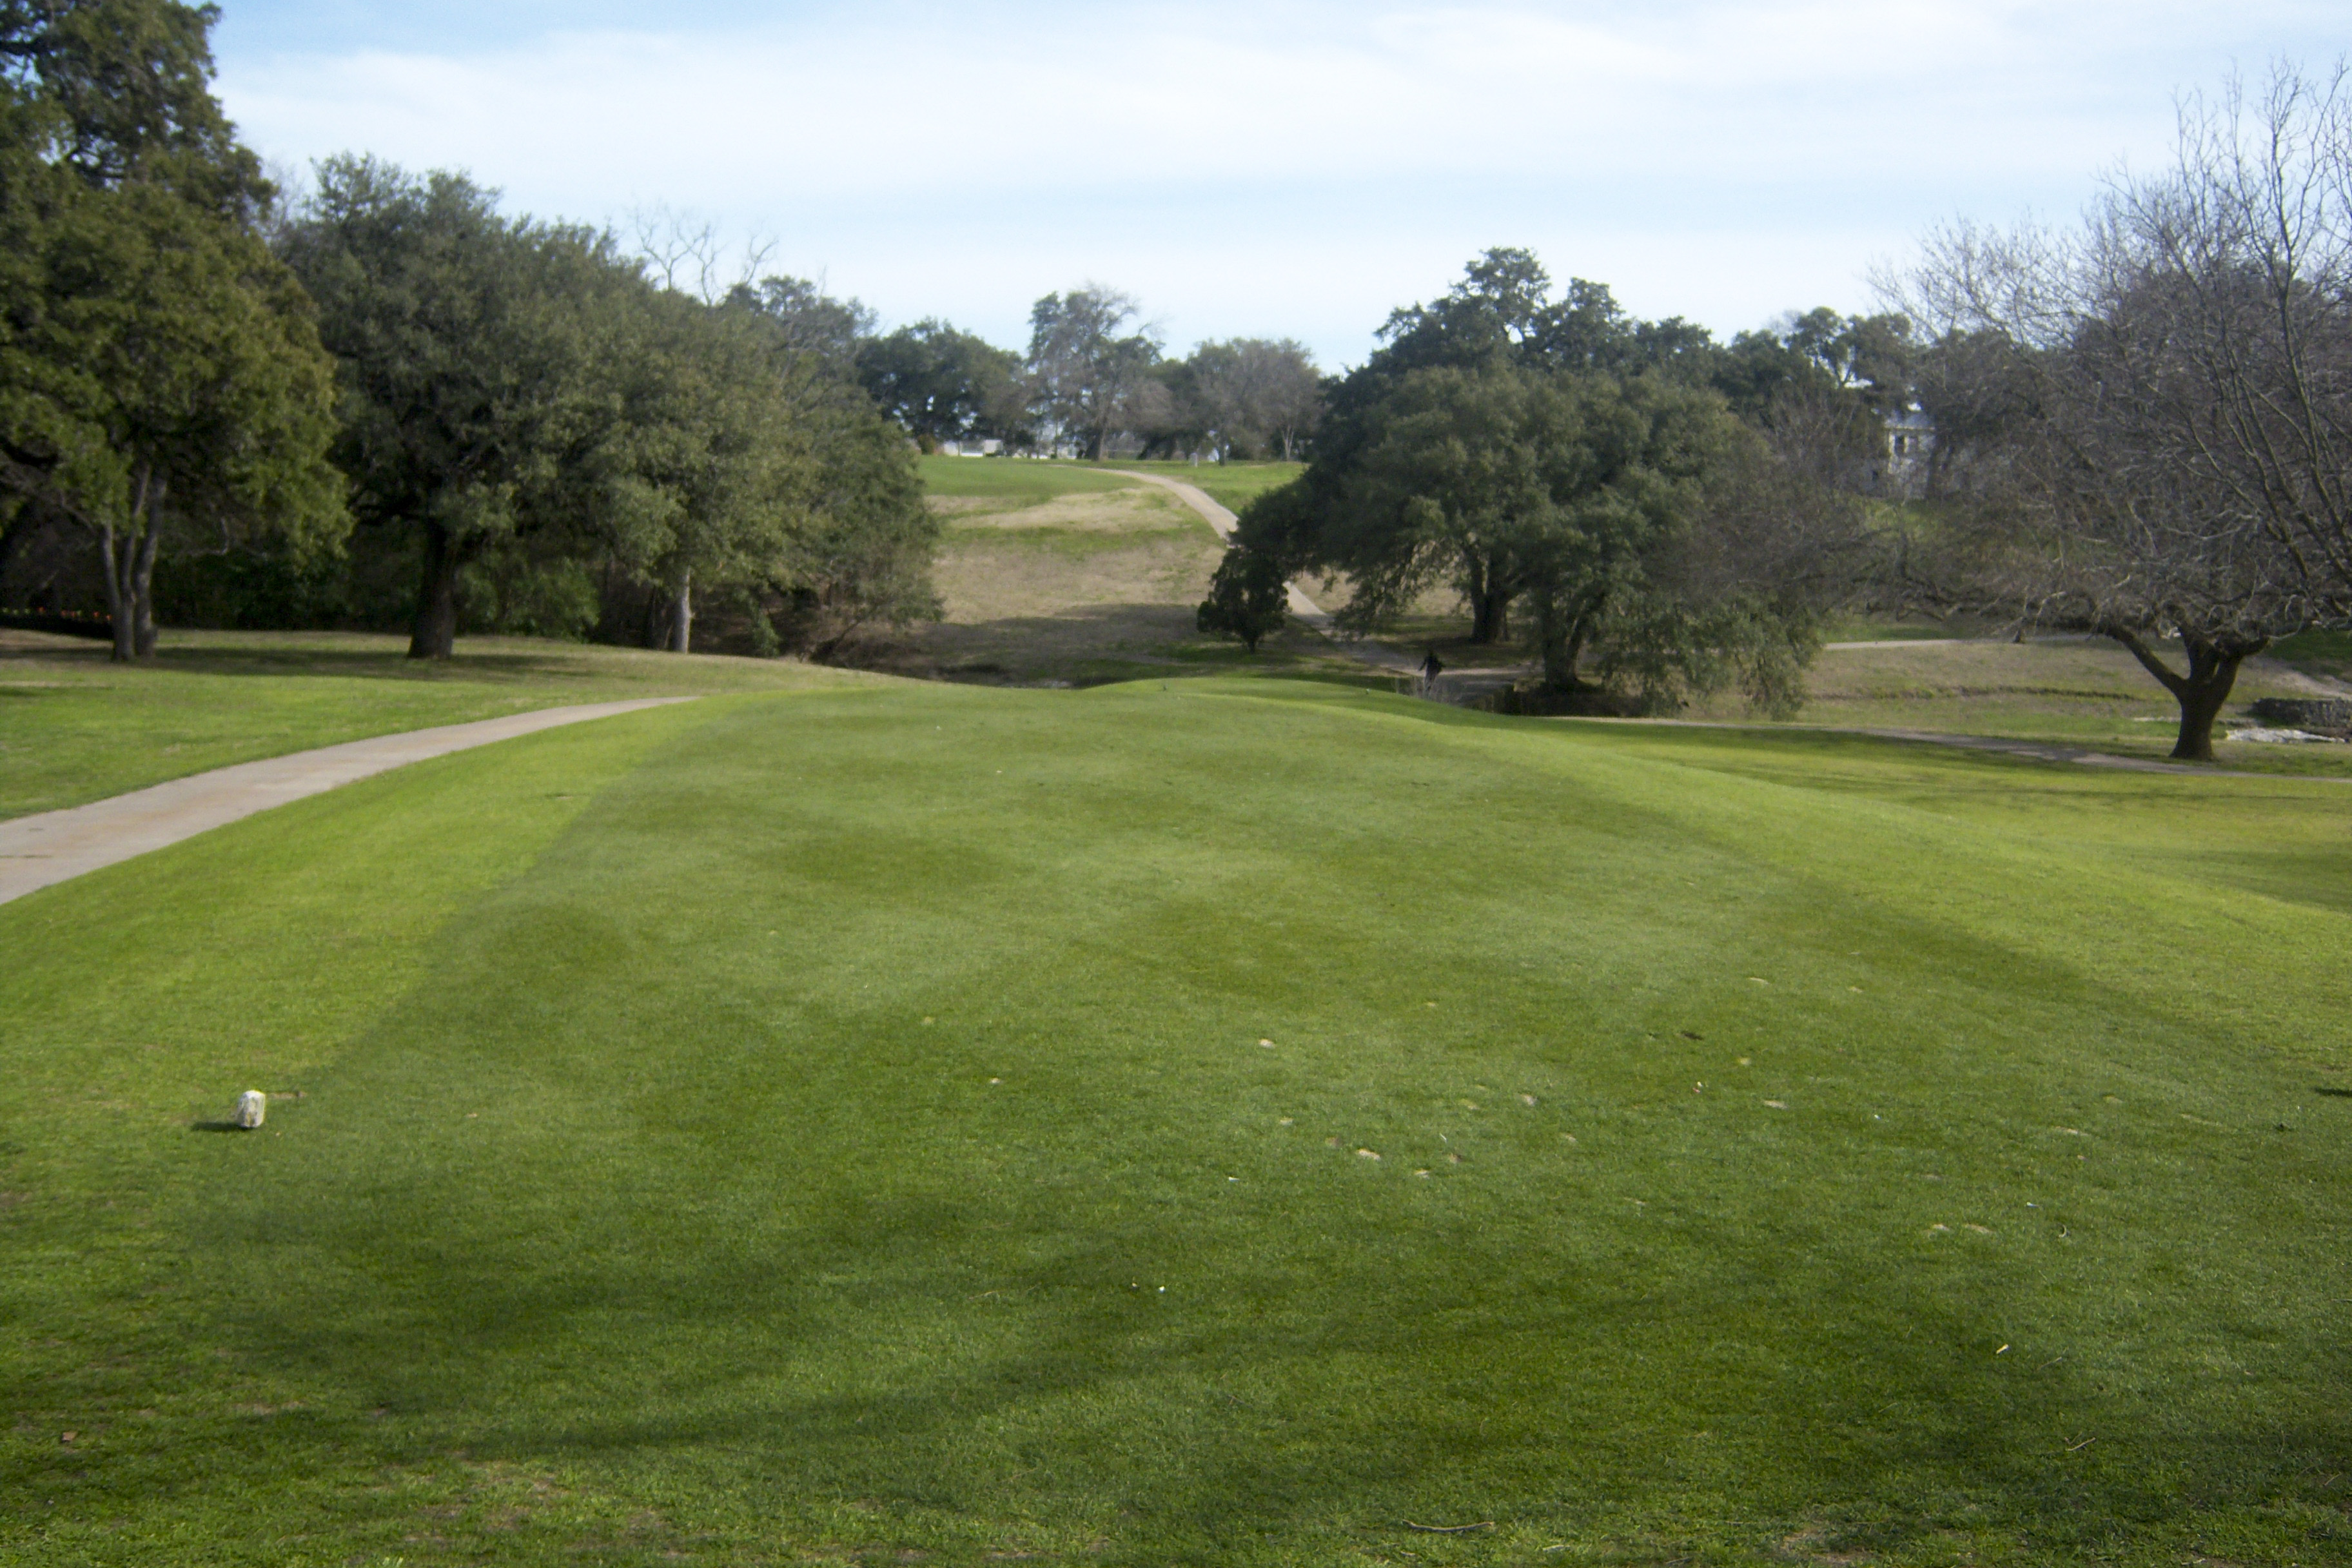
#7 par 5 468 yds.
Number 7 is a short par 5 in terms of distance, only 468 yds. long, but it’s all uphill. No real hazard threats on this hole, just put together two or three good, solid shots and work your way up the hill. The green is elevated, guarded by two bunkers and has a ridge that runs through the middle of the surface. The green drops off back-right and off the front so landing in a bunker on your second or third shot is actually better than catching the run-off and rolling all the way down the hill. Don’t be tempted by a flagstick that’s tucked near one of those runoffs. Aim for the middle of the green and give yourself an opportunity at birdie or par.

Walking away with par on #8 is just as good as making birdie on other holes.

#8 par 4 425 yds.
This par 4 is long, doglegs hard the left and is extremely narrow. Off the tee, you have to be either straight of slightly off to the right. If you go left, you’ll have absolutely no chance of reaching the green in two. Your approach shot demands precision because of the thick trees on the left and right of the fairway. There are two bunkers on the front-left and front-right that you must clear but don’t hit it too far, because the green runs off the back and right down the hill. I’m not going to lie, this is a difficult hole. Walking away with par is a great victory.
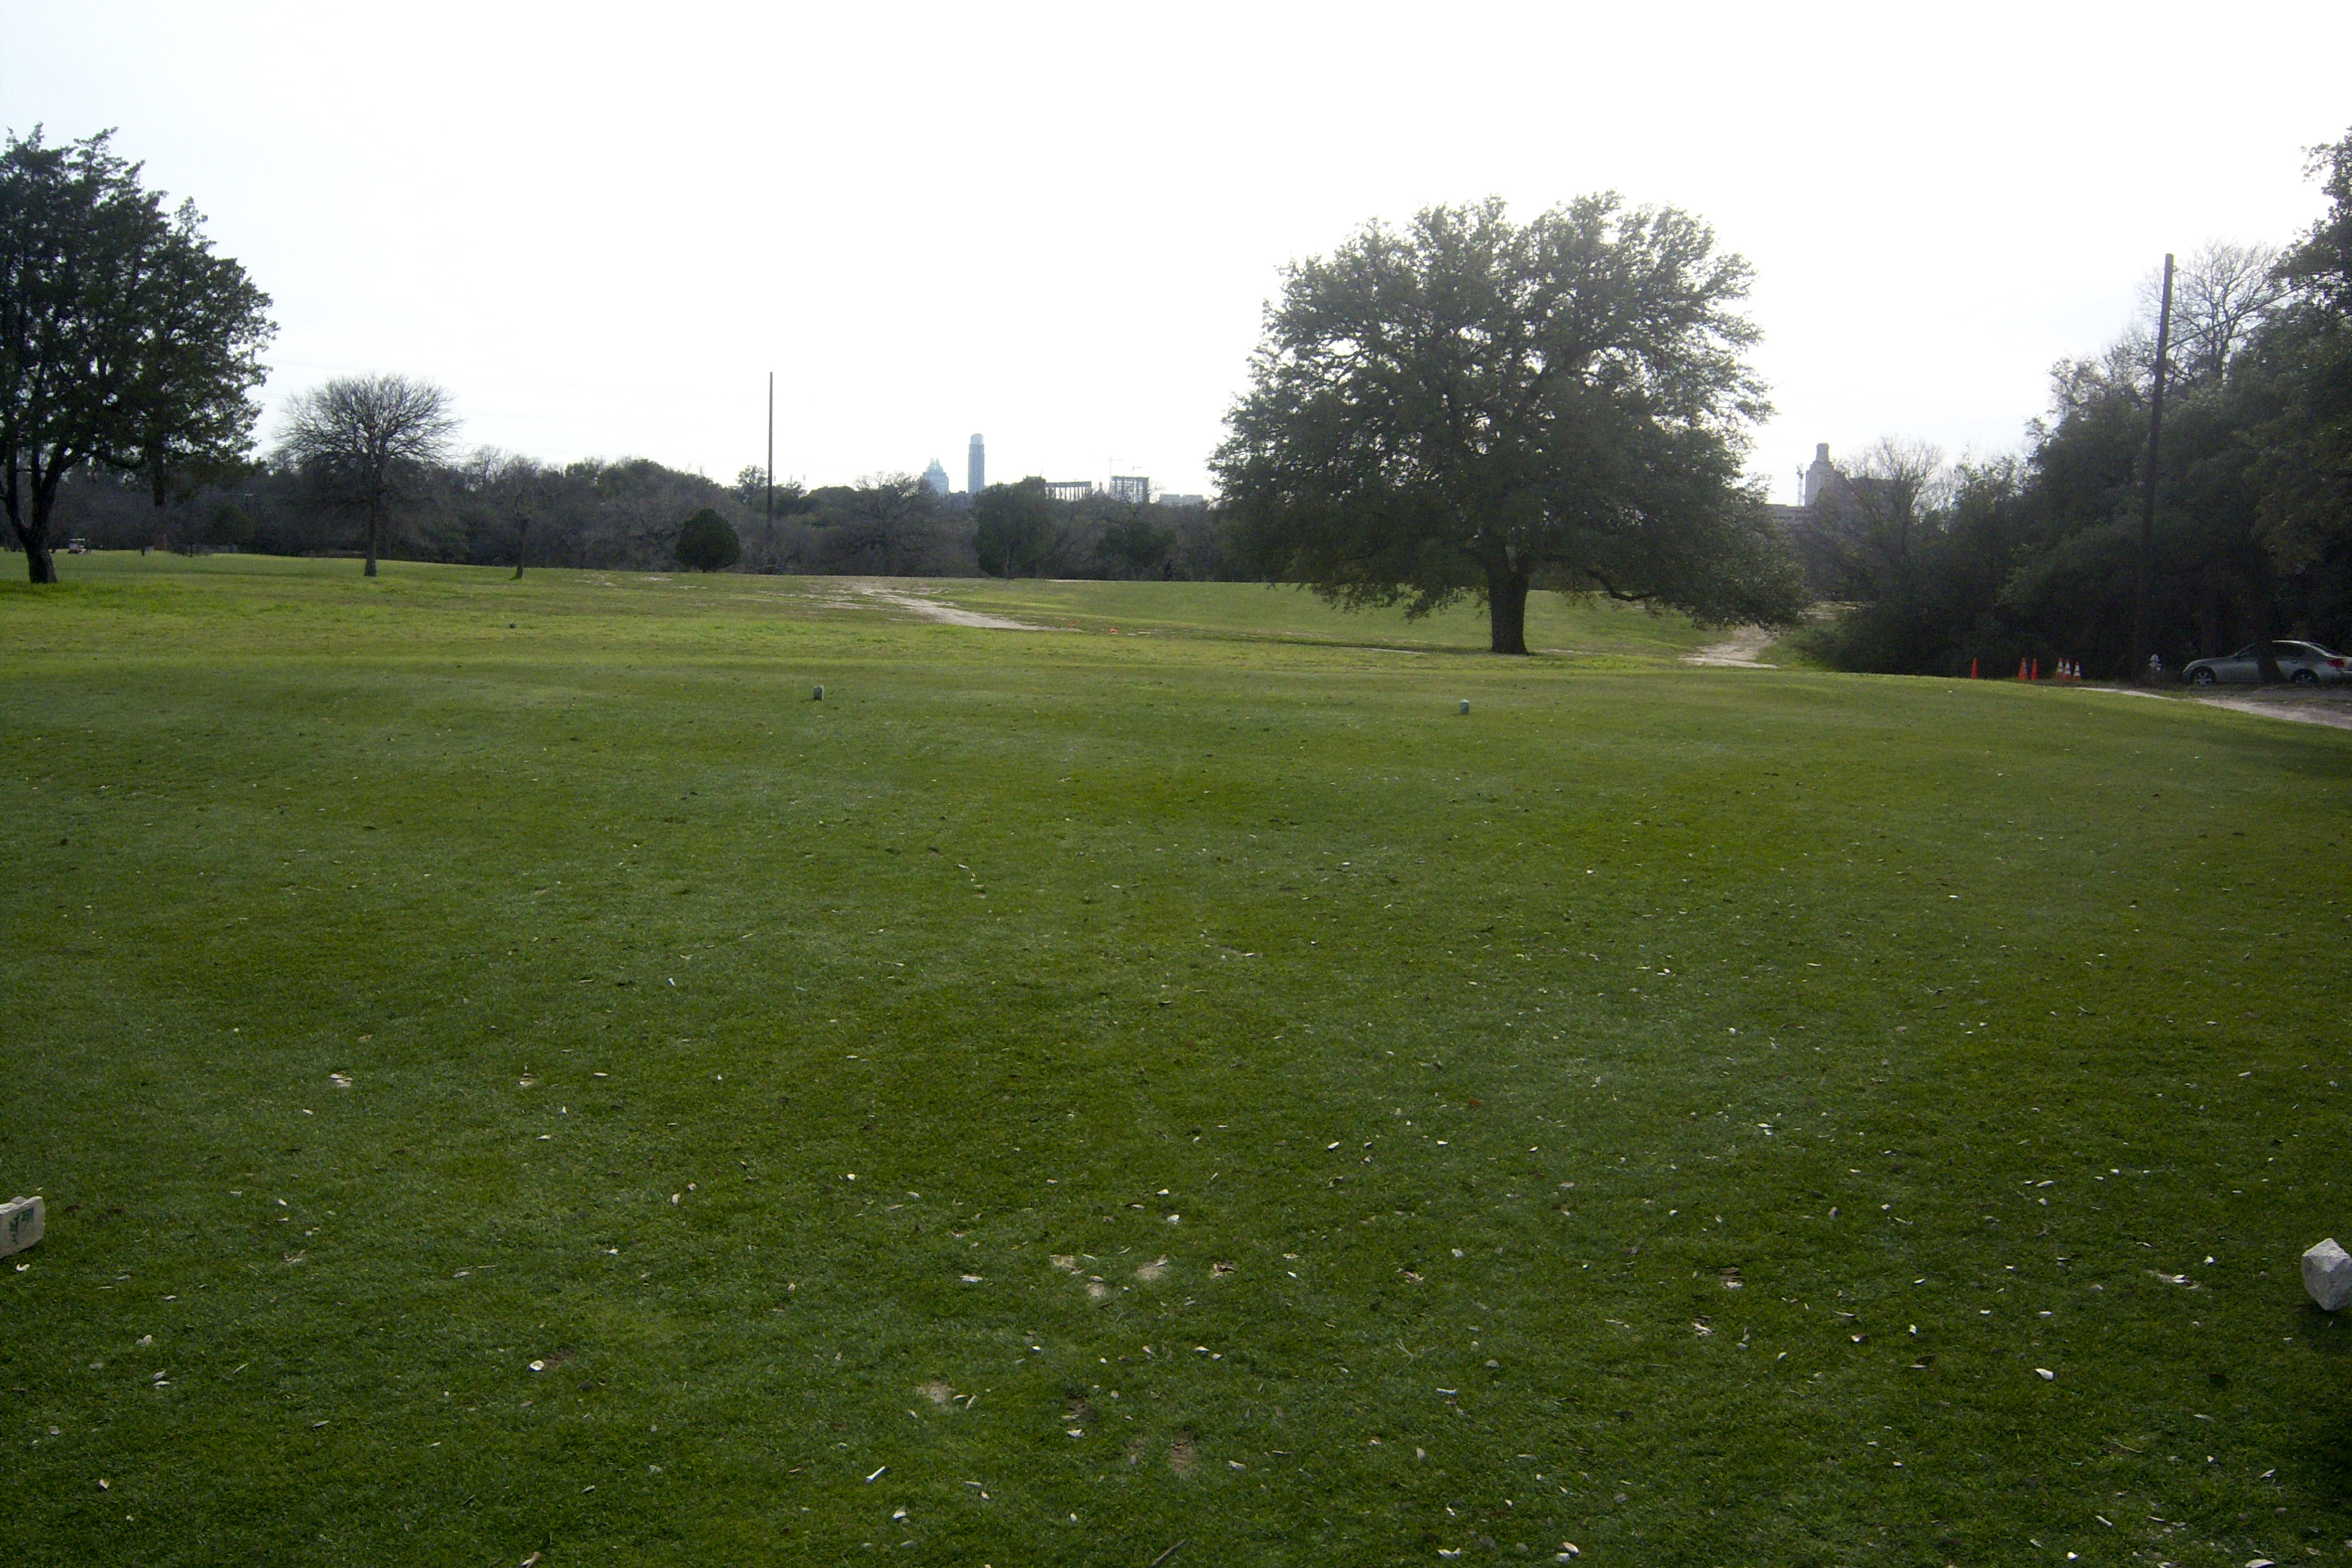
#9 par 4 386 yds.
You’ll see people take a lot of different angles off the tee on #9. The safest route is just to the left of the cart-path with a slight fade back to the right. A lot of players will aim to blast it over the two trees right in front of you, but be careful about going that route. There is a wooden fence just to the right of the trees that is out of bounds. If you push the ball even a little to the right, you’ll be O.B. and teeing off again on with your third shot. The green itself is elevated and guarded by a deep bunker that stretches across the front of the green. Once I get my distance, I always use one club higher than what I would normally hit because of the green’s elevation. From a perception standpoint, it’s misleading because it looks a lot closer than it really is. The surface slopes from back to front and rolls of the left and right of the green. You want to be on the front, putting uphill rather than on the back putting down, but make sure you don’t leave your approach too short. That bunker is deep and can be extremely unpleasant.

Next Friday: back-nine at Jimmy Clay G.C.

Donnie’s Friday Focus: Morris Williams back-nine

Last Friday, I focused on how to maneuver through the front-nine at Morris Williams G.C. Today we’ll take a look at the back-nine and I’ll tell you the places to want to be, and places you want to avoid on your way to a successful round.

#10 Tee

#10: par 4 406 yds.
There’s no tricks on this drive. You have to hit a straight ball of the tee. The fairway is fairly wide, but you have trees and water on either side so keep your drive as straight as you can. The rest of the hole is extremely open and easy.

#10 Green

There’s a lot of room around the green and no bunkers. If you pull your uphill approach far left, the street may come into play but you would have to be way off target to reach it. The green is flat and easy to putt. If you avoided trouble off the tee, this hole is yours for the taking.

#11 Tee

#11: par 5 486 yds.
In my opinion, this is the most difficult hole on the golf course. That doesn’t mean you can’t score well, it just means you’ll have to earn it. The tee-shot is partially blind because the hole drops significantly down the hill and doglegs right. Aim toward the double power lines in the distance and let it rip if you want a chance to make it over the creek in two.

#11 Green

Even if you decide to lay-up on your second shot, the lay-up is difficult because there’s not a lot of room in between the bottom of the hill and the water. Be careful with your distance. The green is all the way back up the hill and guarded by two front bunkers that are deep. The green itself slopes from back-left to front-right. If you make birdie you should be proud, but even walking away with par on this hole is as good as a birdie on others.

#12 Tee

#12: par 3 196 yds.
Another scenic par 3, #12 is on the side of a hill that rolls sharply toward the woods. You must clear the creek and avoid the woods on the right.

#12 Green

However, even if your tee-shot is left of the green and safe from the hazards, you’ll still have a nasty chip or pitch shot on a fast J-shaped green that rolls hard right down the hill and toward the trees. Trust your swing and do your best to land the ball on the surface.

#13 Tee

#13: par 4 337 yds.
This hole is where course experience pays off. What I’m about to tell you sounds crazy but take my advice and watch everyone else lose their balls. Aim for the trees straight in front of you. They are situated on a mound that will naturally kick your ball right to a narrow fairway at the bottom of the mound and you’ll be left with a 100 yd. shot into the green.

#13 Green

If you try to squeeze your way with a draw into the fairway, you’ll either end up in the woods on the right, hitting it past the narrow fairway and into the woods or pulling it left behind the trees with no chance of reaching the green. Aim toward the mound and roll the dice. The green is guarded by water on the front-left and deep woods guard the right and back. Hit a high draw and bail-out long and left if necessary.

#14 Tee

#14: par 3 175 yds.
There’s not a lot of danger on this par three. The water is literally right in front of you and posses no threat barring a complete duff off the tee.

#14 Green

The path to the green is straight and uphill and the surface itself is flat with no bunkers and plenty of room around the edges. This is a simple hole. Take advantage.

#15 Tee

#15: par 4 376 yds.
This hole doglegs right and downhill. Aim for the cart path off the tee and hit a high fade allowing your ball to roll down to the bottom of the hill.

#15 Green

From there, you’ll have a 100 yd. uphill shot the green. This green is unguarded but slightly two-tiered. The low-point of the green is on the front-right. Depending on pin position, try to stay below the hole giving yourself an uphill put to the pin.

#16 Tee

#16: par 4 409 yds.
If you have a draw in your swing repertoire, this is the time to showcase it. This hole doglegs very sharply to the left and you’re faced with trees on the left and right off the tee.

#16 Green

The fairway slopes from left to right so if you can’t draw the ball, aim toward the left of the fairway because the slope is going to inevitably bring your ball to the right. Your approach is slightly uphill to another unguarded green. The surface funnels toward the middle from the front and back. If you avoid trouble off the tee, the rest of the hole should be a breeze.

#17 Tee

#17: par 5 503 yds.
This is another partially blind tee-shot that rolls to the bottom of a hill. Aim just left of the big tree and remember a miss left is better than a miss right. The trees are much more dense on the right.

#17 Green

Your second shot is completely blind back up the hill toward the green. Once you get up there, the narrow green is turtle-backed with sand on the left. Judge your distance carefully when approaching this green to avoid rolling off the sides if you miss the surface.

#18 Tee

#18: par 4 415 yds.
You’ve made it to the 18th tee and you’re rewarded with the widest fairway on the course. The fairway slopes from left to right but there’s plenty of room on both sides for you to grab your driver one last time and send him off on a glorious note.

#18 Green

The green is fairly narrow so don’t get caught in the bunker on the left. You wont have very much green to work with at all and the surface rolls off the right making it very difficult to stop your bunker shot on the green. It’s better to be short or long with your approach to the 18th and final green.

Next Friday: front-nine at Jimmy Clay G.C.

Donnie’s Friday Focus: Morris Williams front-nine

The elevation changes at Morris Williams make for some scenic vantage points throughout your round.


Morris Williams is arguably the most challenging public course in Austin. It’s also the longest at 6,637 yds. from the blue tees. The rolling terrain creates nice elevation changes throughout a layout that features small, undulated greens that are slightly elevated.

If you’re used to playing shorter courses like Hancock, don’t be intimidated by Morris Williams’ length. I’m not a big knocker either, and I’ll tell you where to position your ball to have an extremely successful round.

#1 Tee

#1: par 4 373 yds.
The first drive is always nerve-racking, but you have tons of bail-out room on the right. Whatever you do, don’t pull your drive left.

#1 Green

You’ll be behind the trees and have an impossible, blind shot into the green. The green is two-tiered, slopes from back to front and is guarded by a front, right bunker. Place your ball on the tier that features that day’s pin placement to give yourself a flat putt.

#2 Tee

#2: par 5 540 yds.
Longest hole on the golf course. Try to get distance off the tee, but be aware of the trees and water hazard on the right.

#2 Green

I would aim right along the cart path, because the hole straightens out on your second shot. The green slopes from back to front and is guarded by sand on the left and water on the right. If you’re uncomfortable with your approach, leave it short to give yourself an uphill put to the pin.

#3 Tee

#3: par 3 187 yds.
One of the more scenic holes, #3 is 187 yds. long, but it’s downhill to a wide open green with no bunkers. Don’t be intimidated by the water.

#3 Green

The green is there for the taking. Grab a mid-to-long iron and hit a solid shot. Once you get there, the green slopes back to front and left to right. Any shot where you have to clear water might look scary, but this is a really easy hole once you clear it.

#4 Tee

#4: par 4 380 yds.
Duplicate your tee-swing from the first hole. There’s tons of room and the right and lots of trouble left. Keep the same mindset as you approach the green.

#4 Green

A miss right is better than a miss left or long. If you go left, you’ll be in tall weed-grass that’s impossible to get out of (trust me). If you go long, your ball will run off a green that slopes from front to back and down the hill into the woods.

#5 Tee

#5: par 5 519 yds.
This drive is pretty wide open. There is a street on the left, but you’d have to hit a really long, severe slice to reach the fence. Aim for the gas stations in the distance and try to stay on the left-hand side of the fairway to set up your second shot.

#5 Green

There’s no bunkers to keep you from attempting to reach the green in two on this par five. However, the street still poses out-of-bounds danger on the left and if you miss-judge your distance and go long, your ball will roll all the way down the hill. When you’re down there facing a blind shot back into the small green, you might wish you had laid up.

#6 Tee

#6: par 4 356 yds.
This tee box is where course experience comes in because you can’t see the fairway from the tee. The hole does dogleg left, but it’s better to miss further right than left because of the trees. My advice is to aim for the cart path and if you push it right, it’s ok. You’ll have an open alley to the green.

#6 Green

The green itself is one of the more difficult ones on the course. Walk around and size your putt up from every angle because some of the breaks are misleading. The back portion of the green is fairly flat, but the front breaks toward the middle of the surface and the front-right breaks off the green.

#7 Tee

#7: par 4 412 yds.
Another wide open fairway off the tee, but the street is on your left if you pull it terribly. The fairway slopes from left to right and the more right you are, the more blind your uphill approach will be.

#7 Green

The perfect drive is right along the inside right of the cart path. If you are faced with a blind approach from the right side, aim for the cluster of trees on the left and hit a high fade. The green is not guarded by any bunkers, and one of the more flatter surfaces on the course. It is especially easy to putt if you’re on the front putting uphill.

#8 Tee

#8: par 3 174 yds.
At 174 yds., this green is closer than it looks from the tee. Two bunkers guard the front of the surface and the the green slopes off to the left and off the back into the woods.

#8 Green

The only open area around the green is to the right. The green is flat, so you can stick your ball pretty much anywhere on the surface. If you miss, miss long and right.

#9 Tee

#9: par 4 393 yds.
There are some obviously thick trees on your left, so leaving your club-face open on this drive to avoid going left is not a bad thing, there’s plenty of room right. Your approach will be slightly uphill to a two two-tiered green with one bunker on the front-right.

#9 Green

The angled green slopes from the back-right to front-left. Depending on pin position, it’s easier to put from the left side of the green up-hill, then the right side putting down-hill and right to left.

Next Friday: back-nine at Morris Williams G.C.

Photos by: Donnie Hogan

Donnie’s Friday Focus: Hancock G.C.

The classic, risk-reward finishing hole at the oldest golf course in Texas.

Municipal golf courses are great, cheap ways to hone your skills. Austin has a plethora of links to choose from, but playing a course for the first time can be a frustrating experience if you don’t know the lay of the land.

Consider me your pocket caddie. Each Friday, I will highlight Austin’s public courses in nine-hole segments complete with pictures, yardages and descriptions on how to maneuver your way to a successful round. First up: Hancock G.C.

Built in 1899, Hancock is the oldest golf course in the state of Texas and was the original site of the Austin Country Club. Currently, Hancock is a nine-hole public course that is challenging despite its short yardage (only 2633 yds. from the blues). Greens fees are cheap if you walk (only $12 during the week, $13 on the weekend), but remember to bring cash because they do not accept debit or credit cards. I found this out the hard way.

(editors note: I play from the blue tees, so all of my yardages will reflect starting from that position.)

#1 Tee

#1: par 3 152 yds.
Considering Hancock does not have a driving range, #1 is a nice, easy starting hole because it’s a 150 yd., downhill shot to a decent sized green with no bunkers. Going into a round cold is always difficult, but it’s easier to start with a short iron in your hand rather than a driver.

#1 Green

The small creek that runs in front of the green doesn’t really come into play because of the tee’s elevation. The green is fairly undulated and slopes from back to front and right to left. Depending on the pin position, the ideal spot would be on the front of the green putting uphill rather than above the pin putting down.

#2 Tee

#2 par 5 462 yds.
This is the only par 5 on the course, so get a birdie while you can. Keep your drive on the right-hand side of the fairway. Then you’ll be faced with a decision to go over the creek or lay-up. The hole is short, only 462 yds., but it doglegs left, uphill to the green.

#2 Green

If you’re comfortable with your long irons or fairway woods, give it a rip. The green is fairly small, but flat with no bunkers. If you decide to go for it in two, you don’t have much danger around the green to make you question your decision.

#3 Tee

#3 par 4 357 yds.
Number three is a good driving hole. By now you should be warmed up, again due to Hancock’s lack of a driving range. The trees make the drive look intimidating, but there’s a lot of room once you get past them.

#3 Green

Gear back for a hanging power-fade, pick a starting point and let it rip. The narrow green slopes from back to front and if you pull your approach left, you’ll end up out-of-bounds in the street. You want to be on the front of the green, putting uphill. If you’re going to miss, miss short and right.

#4 Tee

#4 par 3 144 yds.
Number four is another easy, mid-range par 3.

#4 Green

The street still poses an out-of-bounds threat on your left, so a miss to the right is your bail-out if things go wrong from the tee. The green is relatively easy and flat with a slight break from right to left. This is the easiest hole on the golf course, take advantage.

#5 Tee

#5 par 4 249 yds.
Similar to #3, this is another tee that is not as scary as it looks. The creek and and trees are not in play as long as you don’t duff your drive.

#5 Green

If you keep it relatively straight, you’ll be near the top of the hill even if you didn’t pound the ball. I recommend hanging a high draw over the two right trees and aim to land the ball right along the cart path. The green slopes from back to front and is guarded by trouble all along the left side. If you miss hit your approach, bailout short and right.

#6 Tee

#6 par 4 324 yds.
This is the first of a two blind tee shots on the course, because you can’t really see where your ball is going to land in the fairway.

#6 Green

However, there’s plenty of room left and right of the fairway with scattered trees, but nothing too thick you can’t get out of. The hole is only 324 yds., so give the ball a ride off the tee. The green is skinny and turtlebacked, meaning it’s high-point is in the middle and the ball rolls off all sides. Make sure you don’t miss left or long on your approach or your ball will roll all the way down the hill and you’ll be faced with a very difficult pitch back up to the green.

#7 Tee

#7 par 4 335 yds.
There’s trouble on the right off the tee, but you have a lot of room left. It’s a short hole, so try to get as much as you can off the tee, but don’t push the ball right.

#7 Green

Be careful with your approach to this green. The green itself is elevated, so if you miss left, right or long, you’re most likely to be out-of-bounds. Hit a clean shot, but take a little off of your approach if you’re uncomfortable with your distance.

#8 Tee

#8 par 4 346 yds.
Another blind tee shot, but you have a lot of room left. Due to the large tree on your right, you have to work the ball from left to right anyway. Hang a high fade out there, if it fades back to the right, great.

#8 Green

If not, you’ll still be at a good angle into the green. This is the only green on the course with bunkers. Even if you get stuck in one, the two-tiered green funnels to the middle on the front-tier. Don’t go over the ridge or you’ll roll all the way to the back of the green.

#9 Tee

#9 par 4 264 yds.
This is my favorite hole on the course. This is a classic risk-reward hole. It’s only 264 yds., but the fairway slopes harshly from right to left where a hater hazard guards the green.

#9 Green

Once you get there, the green follows the contours of the hole and slopes toward the water. You want to be below the pin putting uphill, but to achieve this, you have to flirt with the water on your approach. This is a great finishing hole.

Next Friday: font-nine at Morris Williams G.C.

Photos by: Donnie Hogan